Explain Everything for Monitoring Student Conversations

Explain Everything is a fabulous app with that can be utilized by both teachers and students. Below is a simply activity that takes little time to prepare but can have a big impact on your students usage of vocabulary in a conversation.
In my class, I wanted my students to review and use the vocabulary we learned in a previous lesson. In my ‘pre-iPad’ days, I would have the words cut up for each pair of students. They would lay them on the table and then each time they used a word, they would pick it up and get a point. Adding the competition to the activity helped a bit, but I still found it challenging to get my students to speak in only English during the activity. Many of them would switch back into their mother tongue the minute I stepped away and start discussing what they did the previous weekend. I would then move back to the ‘offending’ table to help keep them on track, but then the more disciplined students would suffer because I wasn’t able to give them my attention. As a single teacher in a class with 25+ students, you can’t be everywhere at once and monitor what every student is doing or saying. Explain Everything assisted me with this. It also helped the students stay on track and enabled them to review their conversations and vocabulary usage afterwards.
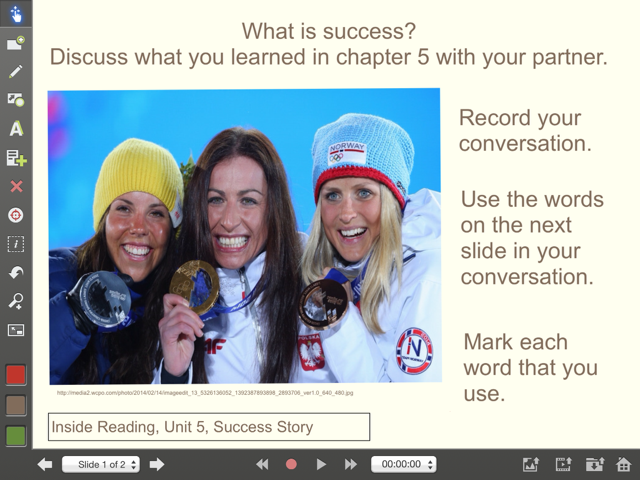
On the first slide, I put the conversation topic, an image to get them interested and the instructions.
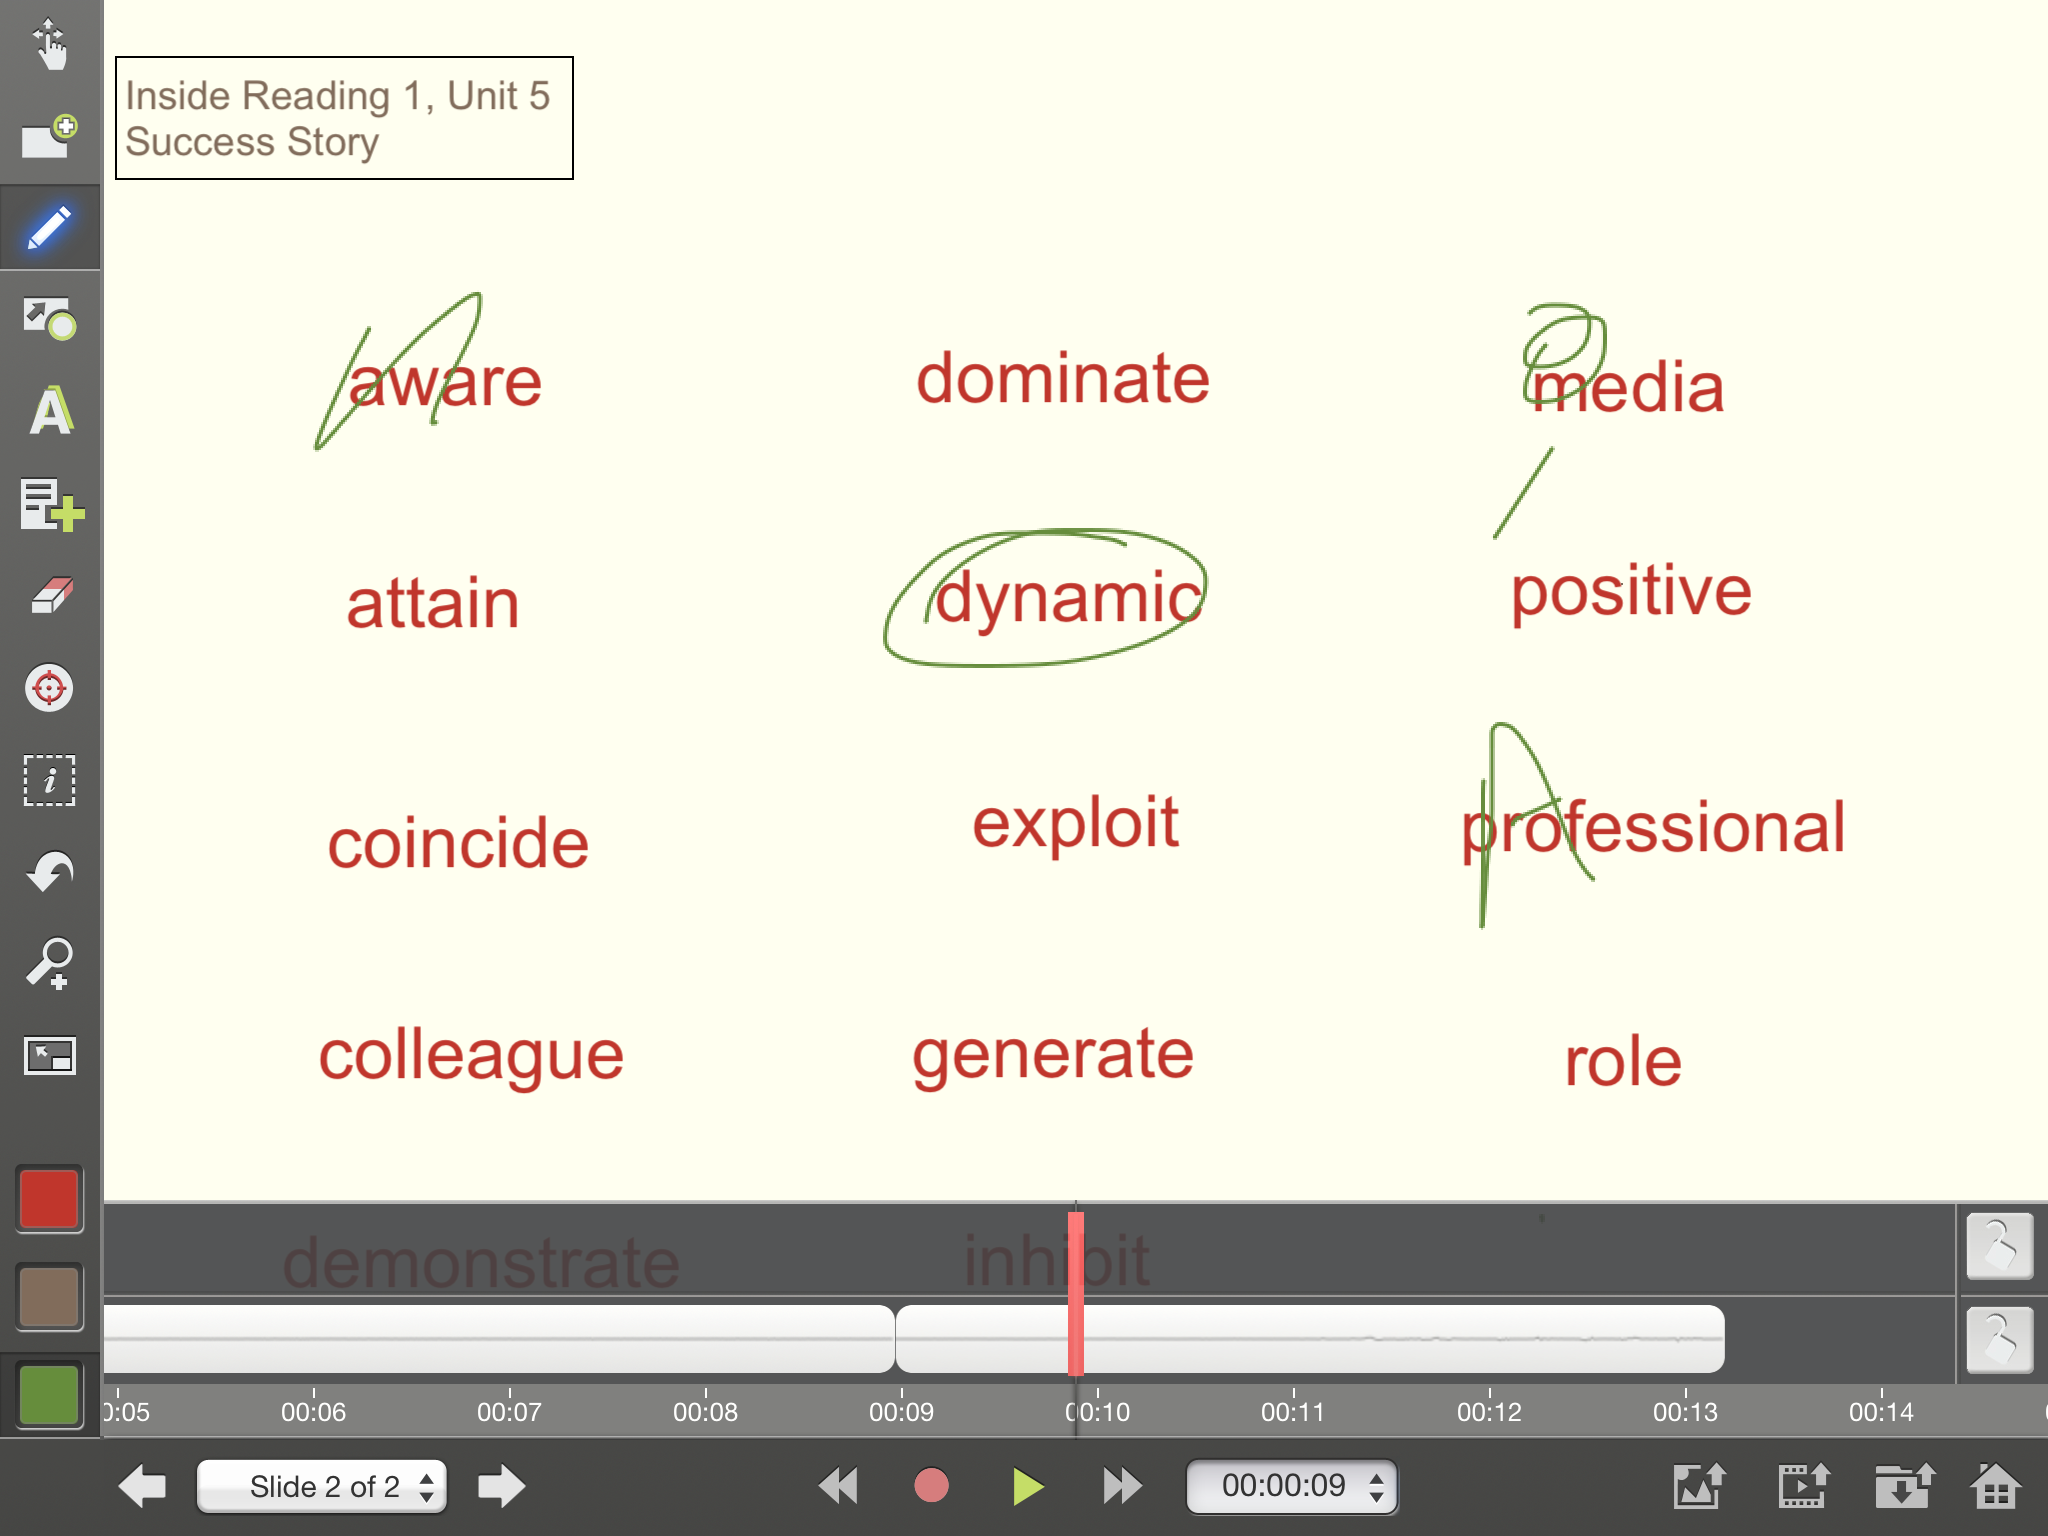
On the second slide, I add the words I want them to use. I usually keep them in alphabetical order so that they are easier to find. This is also where they start recording their conversation and mark the words they use.
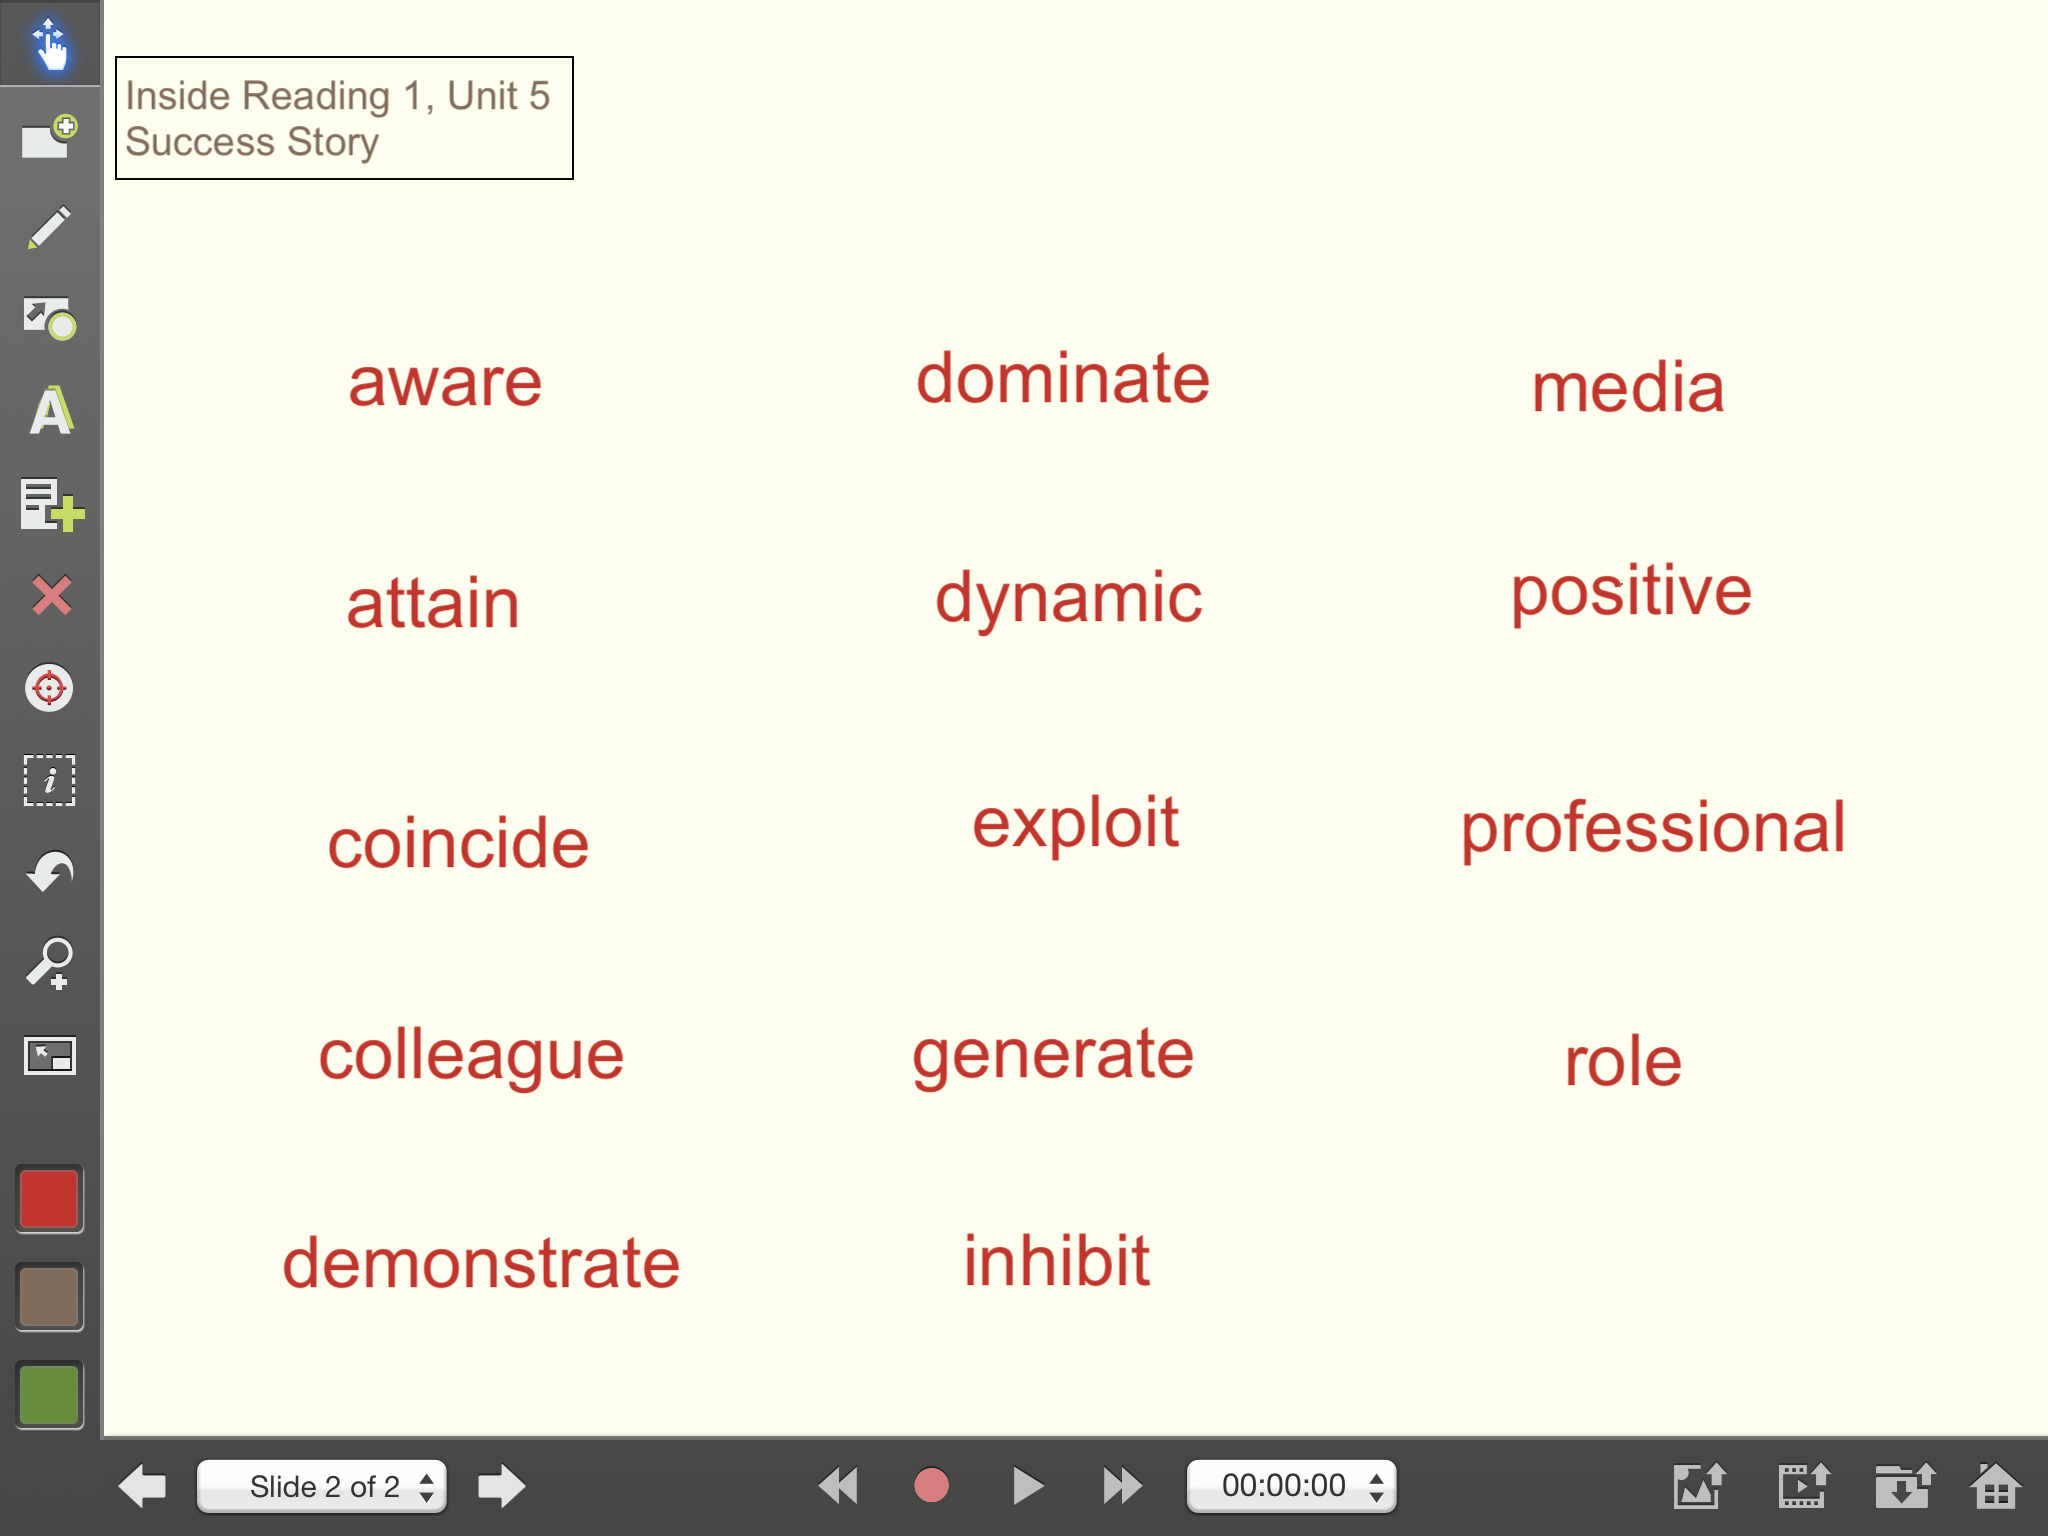
If you are using one iPad per pair or group, then the students simply use a unique mark each time they use a word. They can use the word multiple times by simply marking it again for an additional point or putting tick above their original mark. If they are able to use all the words correctly in a single conversation, they get 5 bonus points. If each student is using their own iPad, then they simply mark the words they use with a tick. Having each student use their own iPad is ideal since it is easier for them to save the file for future use and ensures their voice is the loudest on the recording.
If during the conversation they believe their partner didn’t use a word correctly, they can raise their hand for an objection and pause the recording. The instructor then goes over to check to see if they used the word correctly by having the student repeat the sentence or reviewing the recording. If it is correct, they keep the point. If it is wrong, they lose it. Then the students can carry on with the conversation and continue the recording.
This is a great way to monitor the students without standing over them. They can send you their finished conversations through one of the file sharing apps or by uploading it to YouTube and sending you the link. Will you be able to listen to all of them? Maybe not, but the students don’t know that and each time you do this lesson you can choose a few students to listen to each time and send them personal feedback. The students can also listen to their conversations and review their own use of the vocabulary and the amount of quality speaking in each conversation. The best way I found was to save the recordings and use them for a speaking portfolio. The students can review them and choose their 3 best to include. This gets them to review their own speaking and limits the number that you need to listen.
Overall, I found a huge difference when using Explain Everything to record student conversations in the class. Instead of spending my time keeping them on track, I spent it encouraging them, answering their questions and helping them to use to the words correctly. I was really impressed with the amount of English they spoke once they hit the record button. It also saved me from having to cut up a hundred pieces of paper.
It is a simply, but very handy app that can used in various ways. If you are not how to create an Explain Everything presentation or activity, here is the link to all their online video tutorials.
Recent Posts
Teaching infographics #2 – VOCAL: Traits of a Successful Online Teacher
This graphic is a quick guide for some common s...10 routines for teaching online – #4 Talk types
The idea of ‘talk types’ is loosely...
Differentiating Instruction in Your LMS
Anyone who has been in the world of education f...